Raise your hand the one who had a small stand selling bracelets? ????
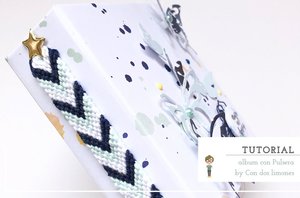
Susi @condoslimones is one of mine, a nostalgic one! And for this new album he has prepared a very special spine topped with a PRECIOUSSS thread bracelet.
I already see you looking for safety pins at home to tie them to the jeans to get going with your bracelet! ?
Hello,
I'm Susi and here we are again with a mini album that I hope you like.
This summer my daughter wanted to learn how to make knot bracelets (they are back in fashion among teenagers) and we got to work. I, in my early childhood, made many, even going to set up a market with my friends and sell them.
This is how the idea of incorporating them into the back of a mini arose. Like most of you, I see scrap and scrapable things everywhere.
If you don't know how to make the bracelets, don't worry, there are hundreds of tutorials on Youtube and they are very easy to do.
In the following video I show you how my mini album turned out, and then there will be a tutorial on how I did it.
will you accompany me?
-
2 pieces of cardboard or chipboard of 11 x 11 cm for the front and back covers.
-
A piece of cardboard of 4 x 11 cm for the spine.
-
A 30 x 14 cm paper from the Indigo Rocks collection to bind it.
-
A knot bracelet
-
a couple of brads

STEP 1
As in any other mini we proceed to cover the cover, spine and back cover with the chosen paper.
STEP 2
Before lining the inside of the mini, using the crop a dile, we will make a couple of holes on the back, to be able to incorporate the bracelet.

STEP 3
Next we introduce the threads of both ends of the bracelet through the holes and adjust by pulling them.
On the inside of the spine we hold the threads with a bit of double-sided tape.
Then, we finish off the spine by putting a brad in each of the holes. This way we will prevent the threads from coming out and the bracelet from moving.

STEP 4
We cover the inside of the album with another decorated paper.
STEP 5
Structure:
For the structure I have opted for a spine structure for 5 sheets with ¼ inch intervals.
We need a 19 x 11 cm piece of cardboard, on which we will mark with the folder
½” – ¾” – 1 ¼” – 1 ¾” – 2” – 2 ½” – 3” – 3 ¼” – 3 ¾” – 4 ¼” – 4 ½” – 5” – 5 ½” – 5 ¾” – 6 ¼” – 6 ¾” – 7”
To better understand the process I leave you a mini video.
We attach the structure to the album with double-sided tape.
It only remains to cut the papers that will be our inner sheets with a measure of 22 x 11 cm and fold them in half.
Then we proceed to paste them on the flaps or tabs of the structure, as you can see in the photo.

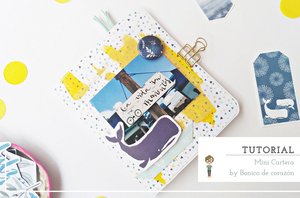
Our mini would already be ready to put our favorite photos and decorate it with the new Die cuts from the Indigo Rocks collection.
I leave you some photos and I say goodbye, but not before thanking you for the visit.